Omeka API Import
This plugin is available for all plans.
The Omeka API Import plugin allows users to import item data and users from an existing Omeka installation (origin) via an API into the user’s Omeka installation (target). Multiple imports from the same origin site will update the data, not create new items. Omeka API Import can be used with two Omeka.net sites or with an Omeka.net site and a self-hosted installation of Omeka.
Requirements
The origin site must have Omeka 2.1 or higher.
The origin Omeka installation does not need to have the Omeka API Import plugin installed, but it does need to have API activated. To do this, the owner of the origin Omeka installation should go to the API tab under Settings, accessed via the top navigation bar on the administrative dashboard. Ensure that the “Enable API” box is checked.
Importing
Without an API Key
Without a key from the origin site, you can import all public items and collections, including their files.
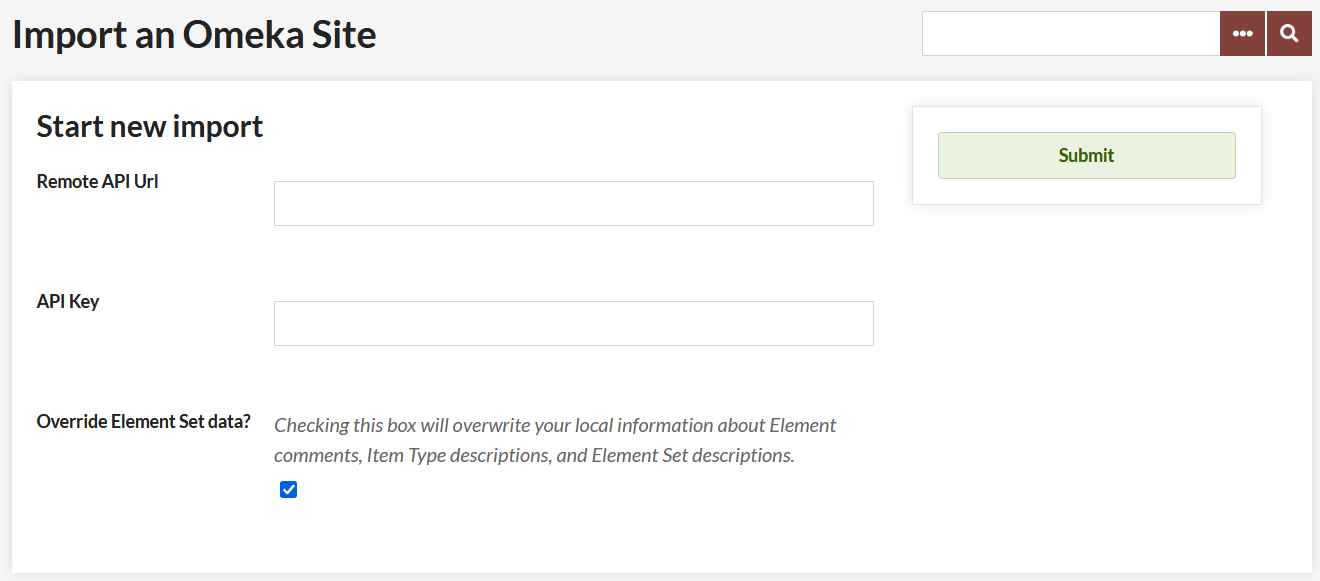
- In your target Omeka.net installation, where the plugin has been installed, go to the Omeka API Import tab on the left hand navigation of your administrator dashboard.
- Enter the API url of the origin Omeka installation (the base url with “/api” at the end, for example originomeka.org/api).
- Ignore the API Key field, since you are not using it.
- If you want to import annotations and changes to the element set on the target installation, check the Override Element set data checkbox. Note: this will overwrite all existing Element comments, Item Type descriptions, and Element Set descriptions.
- Set annotations and changes.
- Click Submit.
Depending on the size of the collection at the origin installation, it may take a few minutes for the import to complete.
With an API Key
If you have access to the admin side of the origin Omeka install, you can use one of the API keys assigned to a user to import users and private items and collections.
To find an API key:
- Go to the Users link from the top navigation in the admin dashboard.
- Click on the Edit link below the name of the user whose key you wish to use. Note: Permissions for an API key follow the user’s account, so for best results, use a SuperUser or Admin user’s API key.
- Click on the API Keys link in the Edit User navigation. Copy the key.
To import using an API Key:
- In the target Omeka installation, where the plugin has been installed, go to the Omeka API Import tab on the left hand navigation of your administrator dashboard.
- Enter the API url of the origin Omeka installation (the base url with “/api” at the end, for example originomeka.org/api).
- Enter the API Key you copied above into the API Key field.
- If you want to import annotations and changes to the element set on the target installation, check the Override Element set data checkbox. Note: this will overwrite all existing Element comments, Item Type descriptions, and Element Set descriptions.
- Set annotations and changes.
- Click Submit.
Undoing an Import
Once you have completed an import, there will be an option to Undo Imports on the Omeka API Import tab on the left navigation in the admin dashboard.
To undo an import, find the url of the import that you wish to undo, check the box next to the url, and click Submit.
Plugins
If the latest Geolocation (v2.2.1 or higher) or ExhibitBuilder (v3.1.1 or higher) plugins are installed and active on both sites, data from those plugins will be imported, too. Deactivate the plugin on either site to prevent the data from being imported.
Back to top